Learn How to Work with Chrome Extension Creator
Introduction
The main idea of the project was to give an ability to a user to create extensions for Google Chrome without any previous experience in programming or WEB design. But another part of our users asked us to add some advanced features in the program. We understand that such improvement will allow to create more powerful and attractive extensions. We will try to give clear description of those places which require some advanced knowledge. So, everyone should be able to use them.
New Extension Creation
To create new extension, you need to create new Project. To do that you need to choose File->New Project… menu item or press Ctrl+N shortcut. Then you will see the next wizard dialog that will guide you through the process of project creation:

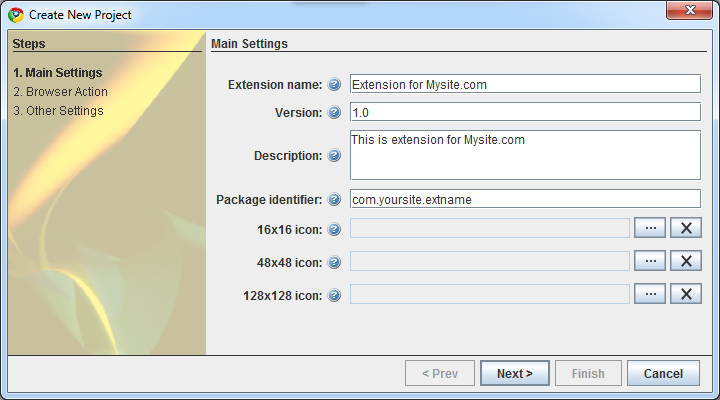
On the first page of the wizard you need to define some settings of your new project:
Extension name – A short, plain text string (no more than 45 characters) that identifies the extension. The name is used in the install dialog, extension management UI, and the store.
Version – One to four dot-separated integers identifying the version of this extension. For example, 1.2 or 1.2.8.
Description – A plain text string (no HTML or other formatting; no more than 132 characters) that describes the extension.
Package Identifier – To avoid conflicts with other developers, you should use Internet domain ownership as the basis for your package names (in reverse). For example, applications published by Google start with com.google.
16×16 icon – 16×16 icon that represent the extension. It should generally be in PNG format, but also some other formats can be used: BMP, GIF, ICO, and JPEG.
48×48 icon – 48×48 icon is used in the extensions management page (chrome://extensions). It should generally be in PNG format, but also some other formats can be used: BMP, GIF, ICO, and JPEG.
128×128 icon – 128×128 icon is used during installation and by the Chrome Web Store. It should generally be in PNG format, but also some other formats can be used: BMP, GIF, ICO, and JPEG.
On the next page of the wizard you need to define some settings for your extension’s button (aka Browser Action). This button will be added in the main Google Chrome toolbar, to the right of the address bar:

Here you need to specify title and icon of the button:
Default title – sets the title of the extension’s button. This shows up in the tooltip.
Default icon – browser action icons can be up to 19 pixels wide and high. Larger icons are resized to fit, but for best results, use a 19-pixel square icon.
At the last page of the wizard you can enable a couple of usefult features:

Post install URL – if not empty, this URL will be opened at the first time after installation of the extension.
Web Property ID – Unique Web Property ID for your extension. Should be taken from Google Analytics site. Format: UA-XXXXX-YY.
Extension Designing: Basics
When you press Finish button in the Project Wizard, you’ll see main workspace of Chrome Extension Creator (click on the image to enlarge):

Here you can design main popup of the extension that will appear when a user click on the extension’s button. To do that, you need to drag one of predefined components form Toolbox panel to the selected popup area. Design process is quite easy and clear. You can drag and drop already added components to rearrange them or move over the Basket icon in the left bottom corner of design area to remove it.
Toolbox Components
As you have noticed, Chrome Extension Creator has a number of predefined component in the Toolbox. Components are basic building blocks that can be used to design the reach extension in a couple of minutes. Now we will put short description of each component to give you idea how to use them.
Search Box
![]()
Search box allows to give a user an ability to search for some info on your site. To do that you need to add this component to the design area and edit Search engine url property. For example, http://mysite.com/search.php?q=. Search term that was entered by a user will be added to the end of the URL. A couple of other useful properties of the component:
Open in new tab – if true, then search page will be opened in new tab. And search page will be opened in the current tab of the browser in the other case.
Placeholder text – text that will be displayed when cursor is out of text box.
Logo icon and Search button image – these proeprties can be used to customize visual appearance of your serch box. It is always useful to keep your logo icon visible somewhere.
Search Box component also has a number of advanced properties. We will show how to use them bit later.
Menu Item
Generally popup of the extension looks like a rich menu with some specific items. We have created standalone component to represent such menu item. Menu items are used to open new URL in a user’s browser. There are a copule of most important properties of Menu Item: